Vermont's Independent Voice
Browse News


Browse Arts + Culture


Browse Food + Drink


Browse Cannabis


Browse Music


Browse On Screen


Browse Events


Browse Classifieds
Browse Personals

Published May 7, 2014 at 10:00 a.m. | Updated October 8, 2020 at 5:36 p.m.
It was a problem of overcrowding: Too many beanstalks were jostling for the small amount of moisture and nutrients in their shared seedling cup. My wife's cold but inarguable logic: Lose a couple now or lose 'em all later. My feeble protests offered insufficient dissuasion. Snip, snip. Those poor little shoots didn't stand a chance.
I've grown quite attached to the many seedlings that have burst forth, almost magically, from the 80 or so planters we've created for them. And while I know that Laura was correct about sacrificing the few to save the many, I'm still a little upset about it.
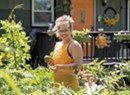
Though I realize this makes us living clichés, we have, upon moving to Vermont from New York City, just started our first garden. And we've decided to be ambitious about it, perhaps to make up for several years of near greenlessness. We've got big plans for these seeds, but we're also committed to gardening on a reasonable budget. Here's how we're doing it.
In an early-'80s gardening book that we happened to have on the shelf, Laura read about a clever system for starting seedlings, and we decided to give it a try. So what if the book was more than three decades old? Plants have been around longer than that, right?
First we needed seeds. We obtained most of them from two sources — High Mowing Organic Seeds in the Northeast Kingdom and the Hudson Valley Seed Library — for no more than a couple of dollars per packet.
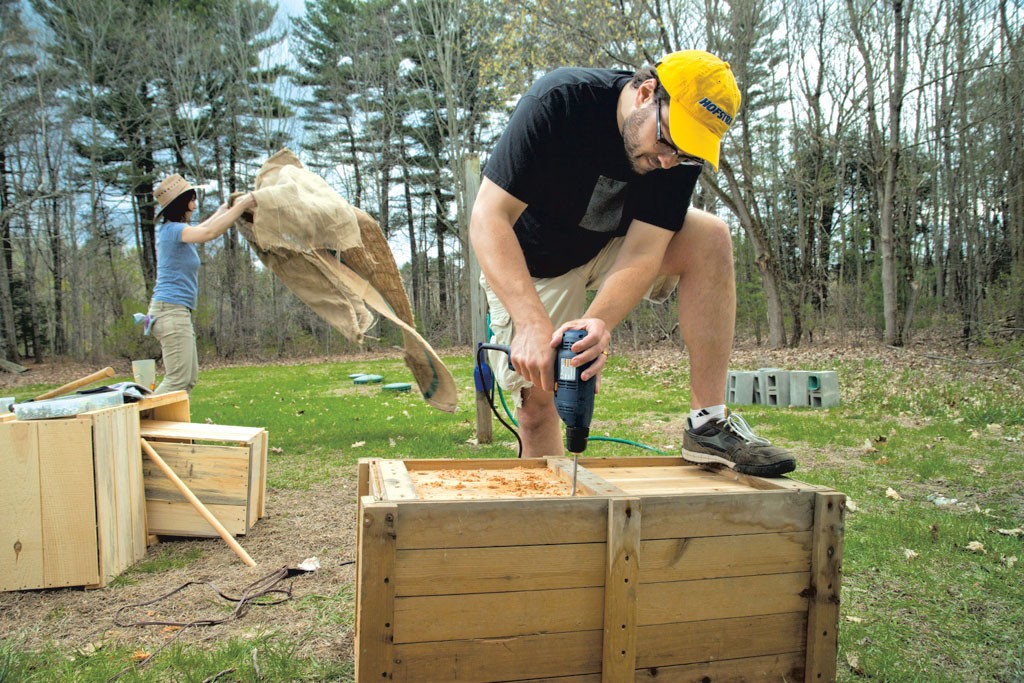
At ReSOURCE's building material store in Burlington, we bought rubber-coated wire racks (former refrigerator shelves) and a couple of banks of light sockets that look like they once framed a vanity. Twelve bucks.
At Lowe's, we picked up about 30 feet of lightweight chain, a chain-cutting tool and six grow lights. The $40 outlay on lightbulbs has, so far, been our single biggest expense. Another $15 got us a basic, two-outlet lighting timer, as well as a roll of metal hanging strips: a coil of thin, flexible, inch-wide metal that comes predrilled with centimeter-diameter holes every inch. This stuff is my new favorite hardware item.
I rewired the banks of lights and plugged up the extra sockets with those little 89-cent doohickeys that turn light sockets into ungrounded outlets. Then, using the hanging strips, we mounted the sets of lights parallel to each other on the wooden beams of our basement ceiling. I plugged both into the timer, which we then plugged into a wall outlet.
With cable ties and an old sawed-off broomstick for stability, we cinched two wire shelves together into one large one. Then, using screw-in brass hooks and lengths of chain, we suspended the shelf so that it rested less than a foot below the grow lights.
Next up: planting. We'd presprouted the seeds in moist paper towels inside plastic bags. Now we needed seedling cups that were sturdy, absorbent and biodegradable. Happily, my job provides me with a free, unlimited supply of newsprint. At the intersection of origami, gardening and the internet, Laura found instructions on how to fold sheets of newsprint into seedling cups. I am thick-fingered and easily bored, so I found this process tedious, but produce cups it did. Exactly 28 of them fit into each of our three seedling trays.
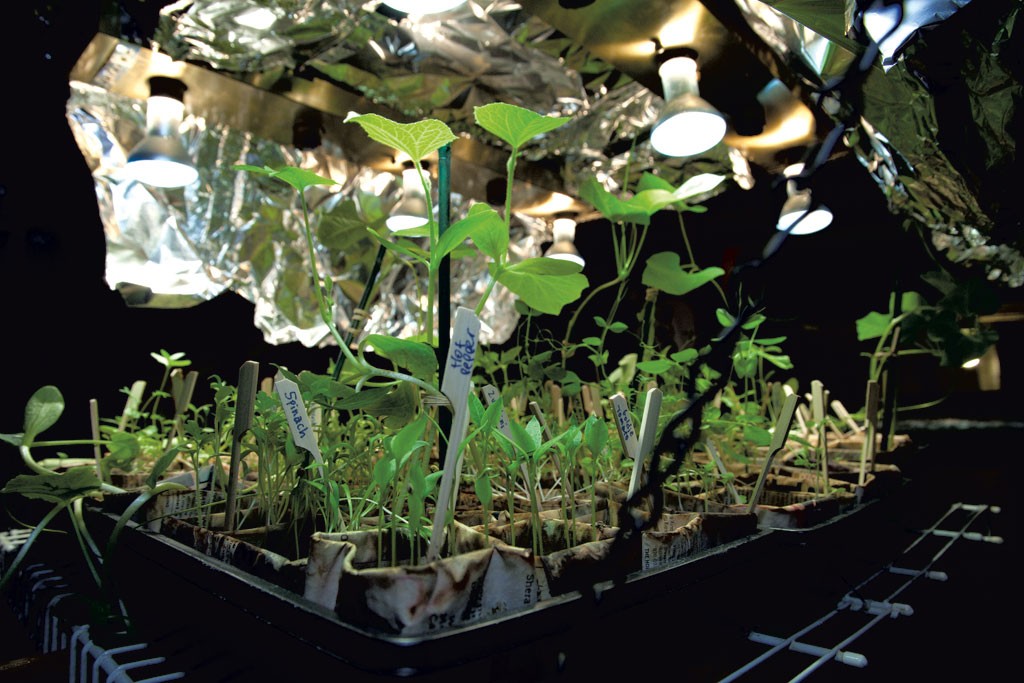
At first, the grow lights stayed on 24/7. Since the seeds sprouted (it took only a few days, and we've had a very high sprout rate: only three or four cups failed to yield), we've periodically lowered the shelf farther from the lightbulbs by simply extending each length of chain by an equal number of links. And, thanks to the timer, the grow lights now take a break for about eight hours a day.
As stated, we planted too many seeds in each cup, at least for some of the plants. Along with the cucumbers, our Northeaster beans were the first to sprout; now, a month later, they're by far the largest and hardiest of the seedlings. Had I consulted another of our outdated gardening books — this one purporting to be an encyclopedia — I could have learned more about the most beneficial sowing methods for each seed. That's on next year's to-do list.
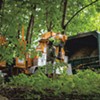
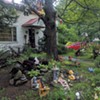
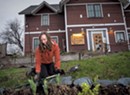
Because we're renters, we decided not to set up a permanent garden outdoors but to use containers. The creative gardener can use nearly any vessel: wheelbarrows, kiddie pools, colanders, bird baths. Nearly anything will work, we learned, so long as you can pack soil into it and make some holes for drainage. We've come up with what I think is a pretty good system.
Some months ago, when my record collection had become unwieldy, I found a great solution: rough-hewn crates from Clifford Lumber in Hinesburg. These babies are sturdy, cheap (about $8 each) and the perfect size to hold LPs — or growing plants.
The crates are great, but without liners, they'd shed too much soil. So we've put down layers of burlap, which we obtained for free (in the form of potato sacks) from the friendly produce department of our local supermarket.
Our rental property has unexpectedly provided us with free gardening materials. There's a decrepit shed in our backyard containing all sorts of debris and building materials from, I assume, previous tenants. It's a mess, but we've salvaged quite a few things from it, including stiff wire mesh, which we'll attach to the crates to make trellises.
The seedlings won't be ready for planting until late May at the earliest. As of this writing, we have yet to make two major acquisitions: soil and pallets. It's easy enough to calculate the total cubic footage of the crates, so we'll place an order from a local gardening supply store.
The pallets will serve as moving platforms for the containers. Our backyard, where the garden will grow, is pretty sizable, but, since tall trees surround it on two-and-a-half sides, the sunlight is inconsistent. Our (OK, Pinterest's) idea: Pick up free wooden pallets from the classifieds or the loading-dock areas of local businesses and outfit them with inexpensive wheels.
Pallets are easy; wheels are a little trickier to obtain on a budget. The cheapest deal I've found at hardware stores is about $9 for a replacement lawnmower wheel, which would bring our per-pallet costs to about $40 — multiplied by three or four pallets. Still working on this one. (I'm also considering finding junk skis — there seem to be a lot around these parts — and turning the pallets into large sledges.)
To move and steer these things, I'll drill two holes through one side of each pallet and insert the ends of a short length of rope, knotting each end on the pallet's underside. This crude rope-and-wheel combo will, I hope, give the crate-laden pallets just enough maneuverability for us to drag them from shady to sunny spots, as needed.
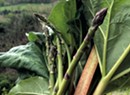
If our plant-care feng shui proves worthy, and if the trellises keep out the bunnies, this summer we will be feasting on broccoli, tatsoi, beans, collards, three types of tomatoes, kale, two kinds of peppers, zucchini, lovage, cucumbers, lettuce, carrots, cilantro, parsley, two kinds of basil, various salad greens, spinach, thyme and snap peas. And we'll be canning for the cold months. Plus, we planted a bunch of ornamental sunflowers and some catnip for our kitties.
Just a month into the process, we've already learned a few lessons that we'll be certain to apply to next year's crop.
First, not every seed should be planted at the same time. Had we done some research on this, we could have prepared for the fact that our seedlings are maturing at different rates; we must hence stagger their planting. Our outdated books actually do cover this, so perhaps we were a little too gung-ho with the DIY attitude.
Still, there may be a silver lining: Since we'll plant all the seedlings in the containers at once, we may free up time and space for a second seeding of certain plants.
Furthermore, we will not plant so many of each type of seed, thus staving off the tragic sacrifice of some of the seedlings. This time, we overcompensated for fear that few seeds would sprout. We now know that our grow-light rig and regular watering are pretty effective, even for the 6-year-old broccoli seeds.
Finally, I'd like to find a biodegradable alternative to the origami newspaper seedling cups. Man, those were a pain to make. That 1981 gardening book suggests alternatives: the "cups" from a cardboard egg carton (we tried this; they weren't big enough), sawed-off milk cartons or pressed-peat pots. We may try the last option next time.
I'm sure we'll make more mistakes along the way, and that's fine. I've really enjoyed getting my hands dirty, literally and figuratively. I remember sprouting and planting beans as a science experiment in third grade, and now I find myself experiencing the same kind of wonder I did then. Plants this big and leafy can grow from that tiny little seed? Really?
Beyond that, it's been pleasurable to work with my hands. I don't get to do a lot of that, because typing doesn't count. But rigging containers and building shelves has provided some of the same "I made this!" pleasure that I get from cooking. And when I do actually cook and eat these veggies, I imagine the satisfaction will be even greater.
The original print version of this article was headlined "Suburban Harvest"
More By This Author


About The Author

Ethan de Seife
Bio:
Ethan de Seife was an arts writer at Seven Days from 2013 to 2016. He is the author of Tashlinesque: The Hollywood Comedies of Frank Tashlin, published in 2012 by Wesleyan University Press.
Ethan de Seife was an arts writer at Seven Days from 2013 to 2016. He is the author of Tashlinesque: The Hollywood Comedies of Frank Tashlin, published in 2012 by Wesleyan University Press.
About the Artist

Matthew Thorsen
Bio:
Matthew Thorsen was a photographer for Seven Days 1995-2018. Read all about his life and work here.
Matthew Thorsen was a photographer for Seven Days 1995-2018. Read all about his life and work here.
Speaking of Gardening
-
Vermont Restaurateurs Add Vegetable Production to Their Long To-Do Lists
Jul 25, 2023 -

Designing Dinner: Lessons From Ellen Ecker Ogden's Kitchen Garden
Jul 5, 2022 -
Age of Asparagus: Planting for the Future as a Link to the Past
May 31, 2022 -
Three Questions for Stone’s Throw Pizza Garden Manager Miranda Dalton
Apr 19, 2022 -

In Starksboro, Marijke's Perennial Gardens Plus Spreads Passion for Native Plants
Apr 5, 2022 - More »
Comments
Comments are closed.
From 2014-2020, Seven Days allowed readers to comment on all stories posted on our website. While we've appreciated the suggestions and insights, right now Seven Days is prioritizing our core mission — producing high-quality, responsible local journalism — over moderating online debates between readers.
To criticize, correct or praise our reporting, please send us a letter to the editor or send us a tip. We’ll check it out and report the results.
Online comments may return when we have better tech tools for managing them. Thanks for reading.