Vermont's Independent Voice
Browse News


Browse Arts + Culture


Browse Food + Drink


Browse Cannabis


Browse Music
Browse On Screen
Browse Events


Browse Classifieds
Browse Personals


Published June 1, 2021 at 10:00 a.m.
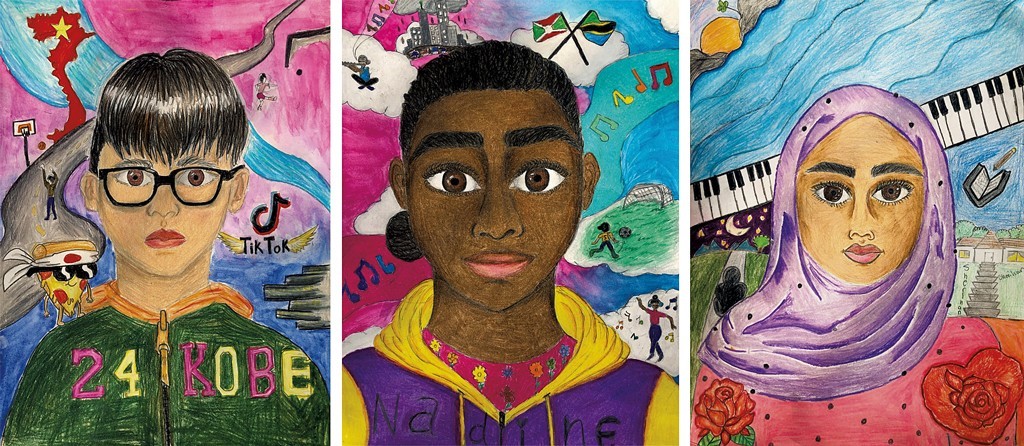
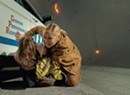
My favorite project to do with students each year is the surrealist self-portrait. In this unit of study, we practice skills in realistic portraiture — understanding face proportions, drawing facial features, and shading realistically — but we also discuss surrealist art and reflect on identity. In imaginative, symbolic self-portraits, students get to communicate who they are and what they care about through visual art.
Though the focal point of each student's portrait is an image of themself, the background space provides opportunities for expressing the varied aspects of their identity. Students can incorporate visual symbols to represent their hobbies and interests, nationality or cultural identity, gender, sexual identity, religion, and even hopes for the future.
Surrealism: a 20th-century art movement characterized by bizarre, strange, dream-like images often featuring odd or surprising combinations of things
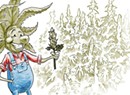
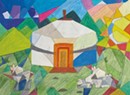
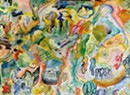
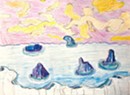
Surrealism provides greater freedom, flexibility and room for innovation in terms of how students can incorporate these representations of their identity. Instead of forcing all of that visual symbolism into one realistic scene, surrealism allows students to organize pictures into fantastical, dream-like depictions. For example, a student who loves video games might draw themselves not simply playing a video game but inside of it — surrounded by the game's setting. A student who enjoys soccer might draw a glowing soccer ball in the sky in place of the sun. Artists of all ages can imagine and create surrealist images, whether using simple symbols — a paintbrush to represent their love of painting — or more complex symbolism, such as a tree to represent familial "roots" or personal growth.
Use the steps and strategies that follow to help you express your identity in your very own surrealist self-portrait!
Portraiture: Drawing Yourself

Required materials: Drawing paper, a pencil and eraser, and a mirror or a photograph of yourself
Optional additional materials: Colored pencils, markers, crayons, watercolor paint, oil pastel
- Have a mirror or a photograph of yourself ready to look at and draw from.
- Using a pencil, begin by lightly drawing an oval shape to represent your head.
- After you have lightly drawn an oval, look closely at the shape of your chin in the mirror or photograph. Erase and adjust the outline of the lower half of the oval to match the shape of your chin as closely as possible.
- Lightly draw two lines bisecting the oval (to bisect means to cut in half). One line should be vertical, splitting the oval down the middle. The other line should be horizontal, dividing the face into equal top and bottom halves.
- Draw your eyes on the horizontal line. It might look like they are too low, at first, but trust me, you'll need all that space above the line for your eyebrows, forehead and hair!
- Check that the eyes you've drawn are not too big or too small — and that they are spaced correctly.
- Draw your eyes' irises and pupils, making sure that the circle of each iris touches or almost touches the top and bottom edges of the eye shape.
- Draw the outlines of your eyebrows! Look closely at the shape and thickness of your eyebrows and how close or far they are from your eyes. Your eyebrows should be drawn a little "longer" than your eyes, extending slightly past the inner and outer corners of the eyes. Later, you can fill in your eyebrows with little lines to create the texture of all the tiny hairs that form your brows.
- For your nose, you'll draw the tip of your nose and your nostrils roughly halfway between your eyes and the outline of your chin. Notice the curved lines that define your nostrils. All noses are shaped differently, so you'll need to do your best to draw the lines that best mimic the shape of your nose.
- Draw the bridge of your nose by drawing vertical, curved lines on either side of the line you drew down the middle of your face. These lines do not need to connect to the outlines of the lower part of your nose.
- Draw your mouth about halfway between your nose and the outline of your chin. Start by drawing the line between your upper and lower lip. Notice — does this line curve up at the corners or down? Does it dip down in the middle? Or is it very straight and flat?
- Next, draw your ears. Notice which parts of your facial features line up with the top and bottom edges of your ears. Usually, the top edges of our ears line up roughly with our eyebrows. The bottom edges of your ears might line up with your nostrils or with the corners of your mouth, depending on the size and shape of your ears.
- Next, draw the outlines of your neck. Our necks usually begin around the base of our ears, but they are slightly narrower than our heads. Look in the mirror or at your photograph, and notice the shape and thickness of your neck. The outlines of your neck might line up roughly with the outer corners of your eyes and should curve in just slightly. If you include your shoulders in your drawing, make sure that their outlines extend out, wider than your head!
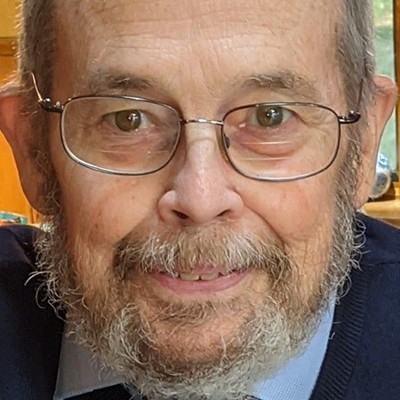
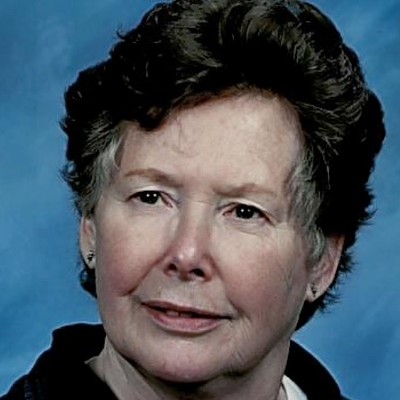
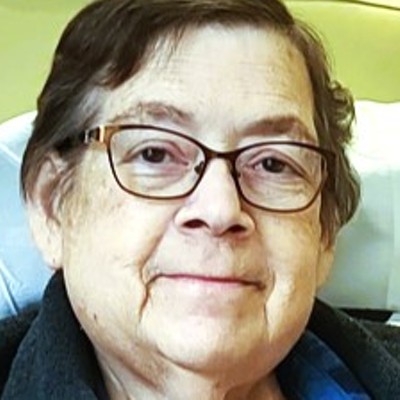
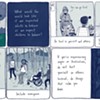
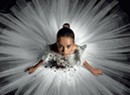
- Finally, draw the shape of your hair or head covering! You will draw either of these overlapping the top of your head, not sitting on top of it. If you're drawing your hair: Instead of just drawing a bunch of lines for your hair, begin by drawing the outline of the overall shape of your hair. Notice the shape of your hairline, or the line where your hair meets your forehead. Later, when you color or shade in your portrait, you can fill your hair with lines that flow with the shape and wave or curl of your hair to create realistic texture. If you're drawing a head covering, such as a scarf, hat or hijab: Notice the shape of your head covering, and do your best to mimic that shape by drawing its outline overlapping the top of your head. Check out the student artwork included here for examples to help guide your drawing!
- Now that your outlines are drawn, erase all of the guidelines you drew to help place your facial features correctly, as well as the upper outline of your head (if you have covered it with the shape of a hairstyle or head covering). You can also make adjustments to your features and face shape if anything doesn't look quite right.

Drawing Tip: You can create a basic eye shape by drawing a curved "sad mouth" line sitting on top of the halfway line, and a "smiley" line below it, connecting the two curved lines at the edges. However, all eyes are shaped differently! Some people's eyes might be wider or rounder, while some might be more almond-shaped or tilt up or down at the outer corners. Look closely at your own eye shape and try to match that shape in your portrait.
Drawing Tip: The space between your eyes should be about the same length as the width of each eye. You should also have roughly this same amount of space between each eye and the edge of your face.

Drawing Tip: Add details such as eyelashes, highlights, "shines" of light you see reflected in your eyes, or any creases or lines you see around your eyes.

Drawing Tip: Use your nose and eyes as reference points to decide how wide to draw your mouth. Are the corners of your mouth lined up with your nostrils? Or are they lined up with the inner corners of your eyes, or with your pupils?
Advanced Artist Tip: When you shade or color in your portrait, you can create the look of shadows by shading the sides of your nose and face slightly darker. Don't make these shadows up. Look at your face in the mirror or photograph, and observe the shadows you can see. Use a shade slightly darker than your skin tone to create these shadows in your drawing. This will help your portrait appear more three-dimensional!
Symbolism & Surrealism: Expressing your identity in a surrealist background
- Decide which parts of your identity are important to you. What do you want to represent about yourself? Make a list!
- Brainstorm & Sketch! You will need to think of a picture to represent each part of your identity that you wish to express in your portrait.
- Put it all together! Use your imagination to come up with a creative background scene that includes the pictures you have chosen to represent you. Surrealism is dream-like and fantastical, so don't be afraid to think outside of the box!
For example:
• Your hobbies and interests
• Your nationality or culture
• The place where you live
• Your favorite foods
• Your religion or traditions
• Your future career goals
• Favorite places and memories
• Your gender identity and/or
sexual identity
• Books, shows and music that you like
• People and pets that you care about
For example:
• Characters to represent your favorite
video game or show
• A ball, racquet or other piece of gear to
represent your love of a specific sport
• A flag to represent your nationality
• Foods or decorations that are important
to your family's holidays or traditions
• Mountains to represent that you live in Vermont
This article was originally published in Seven Days' monthly parenting magazine, Kids VT.
More By This Author
Speaking of...
-
Creating Art That Celebrates the Culture and Climate of Places Around the Globe
Jun 29, 2021 -
Creating Abstract Art Inspired by Nature
Apr 6, 2021 -

Reimagine van Gogh's 'Starry Night' With This Art Project
Mar 2, 2021 -
Show Your Love With a Sentimental Still Life
Feb 2, 2021 -
At-Home Art Project: Creating Winter Landscapes
Dec 8, 2020 - More »
Comments
Comments are closed.
From 2014-2020, Seven Days allowed readers to comment on all stories posted on our website. While we've appreciated the suggestions and insights, right now Seven Days is prioritizing our core mission — producing high-quality, responsible local journalism — over moderating online debates between readers.
To criticize, correct or praise our reporting, please send us a letter to the editor or send us a tip. We’ll check it out and report the results.
Online comments may return when we have better tech tools for managing them. Thanks for reading.